
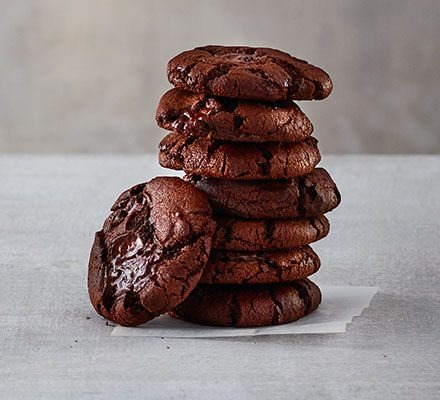
There’s nothing more disappointing than pulling a tray of biscuits out of the oven only to find they’re dry, dense, or rock-hard instead of soft and flaky. The good news is that almost every “bad biscuit” problem comes down to a handful of common, fixable mistakes.
In this guide, we’ll walk through the seven biggest errors that turn tender biscuits into hard hockey pucks, then explain how biscuits are prepared, what the real secret to soft biscuits is, and the seven key steps in the baking process so you can troubleshoot with confidence.
How are biscuits prepared?
Biscuits (in the American sense of quick, leavened bread rolls) are prepared using a simple “cut-in” method that keeps the fat cold and the dough minimally handled. This technique creates steam pockets in the oven, which lift the dough into flaky layers.bakerbettie+2
A typical biscuit preparation follows this basic flow:
- Mix dry ingredients – Flour, baking powder, baking soda, salt, and sometimes a little sugar are whisked together in a bowl.bakerbettie+1
- Cut in cold fat – Very cold butter, shortening, or lard is cut into the flour until the mixture looks like coarse crumbs with pea-sized (and some walnut-sized) pieces of fat.
- Add cold liquid – Cold buttermilk or milk is stirred in just until the dough comes together. It should look shaggy and slightly sticky, not smooth like bread dough.
- Gentle shaping – The dough is turned onto a lightly floured surface, brought together with floured hands, and patted or folded a few times to create layers.
- Cut and bake – Biscuits are cut with a round cutter, placed on a baking sheet, and baked at a high temperature (usually 425–450°F / 220–230°C) until golden.
The entire process is designed to be fast and gentle. The less you mix and handle the dough, the more tender and flaky your biscuits will be healthy .
What is the secret to soft biscuits?
If there’s one “secret” to soft, fluffy biscuits, it’s this: cold fat, minimal handling, and accurate measurements. Everything else is just supporting that core principle.
1. Keep the fat very cold
Cold butter, shortening, or lard is non-negotiable for soft biscuits. When the fat stays solid until it hits the hot oven, it melts rapidly and creates steam. That steam lifts the dough and forms flaky layers.
If the fat warms up while you’re mixing:
- It blends into the flour instead of staying in distinct pieces
- You lose steam power in the oven
- Biscuits turn out dense, flat, and often dry
Tips to keep fat cold:
- Chill or even freeze your butter for 10–20 minutes before starting
- Use a cold bowl and work quickly
- If your kitchen is warm, chill the shaped biscuits for 10 minutes before baking
2. Don’t overwork the dough
Overmixing and over-kneading are among the top reasons biscuits become tough and hard. Every time you stir, fold, or knead, you develop gluten in the flour. A little gluten gives structure; too much makes biscuits chewy and dense.
For soft biscuits:
- Mix the liquid in just until the dough barely comes together
- Handle the dough as little as possible on the counter
- Limit folding to about 3–6 gentle folds to create layers, not to “smooth” the dough
If your dough looks a bit rough or shaggy, that’s actually ideal for biscuits.
3. Measure flour accurately
Too much flour is a silent biscuit killer. Scooping flour directly with a measuring cup packs it down, so you end up adding more flour than the recipe intends. That extra flour soaks up moisture and leaves biscuits dry and crumbly.
Better ways to measure:
- Use a kitchen scale for the most accuracy (around 120–125 grams per cup of all-purpose flour)
- If using cups, spoon flour into the cup and level it off with a knife instead of scooping
- Add liquid gradually; the dough should be slightly sticky, not stiff
4. Use the right flour
Biscuits do best with low- to medium-protein flour, such as all-purpose or soft wheat flour. Bread flour has too much protein and creates a tougher crumb.
If your biscuits consistently come out hard:
- Check that you’re using all-purpose, not bread flour
- Consider a brand labeled for “soft” or “pastry” results if available
5. Bake at the right temperature and time
Biscuits need a hot oven to rise quickly and set before they dry out. Baking at too low a temperature or for too long evaporates moisture and hardens the texture.
General guidelines:
- Preheat your oven fully to 425–450°F (220–230°C) before baking
- Bake just until the tops are light golden and the biscuits sound hollow when tapped, usually 12–15 minutes depending on size
- Avoid opening the oven door repeatedly, which drops the temperature and affects rise
Brushing the tops with melted butter right after baking can also help keep the exterior softer and add flavor.
7 Biscuit Mistakes That Make Them Dry and Hard
Now that you understand the basics, let’s zoom in on the seven most common mistakes that turn biscuits dry and hard—and how to fix each one.
Mistake 1: Using warm or softened butter
Warm butter blends into the flour instead of staying in distinct pieces. Without those cold fat pockets, you lose the steam that creates lift and flakiness, leaving biscuits dense and often dry.
Fix:
- Freeze or deeply chill your butter before starting
- Cut it into small cubes and return it to the fridge if your kitchen is warm
- Work quickly and keep other ingredients (like buttermilk) cold as well
Mistake 2: Overmixing the dough
Every extra stir develops more gluten. Overmixed dough bakes up tough, chewy, and sometimes dry because the structure is too tight to trap moisture and steam effectively.
Fix:
- Stir the buttermilk in just until no dry streaks remain
- Accept a shaggy, slightly sticky dough; it doesn’t need to be smooth
- Limit folds to a few gentle turns to create layers, not to “perfect” the texture
Mistake 3: Adding too much flour
This happens in several ways: measuring flour incorrectly, dumping in extra flour because the dough feels sticky, or heavily flouring the work surface and cutter. All of that extra flour soaks up moisture and dries out the dough.
Fix:
- Measure flour by weight if possible; if using cups, spoon and level
- Resist adding more flour unless the dough is truly unworkable
- Lightly flour your surface and cutter; tap off excess before cutting
Mistake 4: Over-kneading or over-handling
Kneading is great for bread, but biscuits are not bread. Pressing, rolling, and kneading the dough repeatedly squeezes out air, develops gluten, and compacts the layers, leading to tough, dry results.
Fix:
- Bring the dough together with your hands just enough to form a mass
- Pat or gently fold instead of rolling with a heavy rolling pin
- If using a rolling pin, use light pressure and lift as you roll to avoid compressing the dough
Mistake 5: Twisting the biscuit cutter
Twisting the cutter as you press down seals the edges of the biscuit. That prevents the layers from expanding fully in the oven, resulting in shorter, denser, and sometimes drier biscuits.
Fix:
- Use a sharp, round cutter and press straight down without twisting
- Dip the cutter in flour between cuts to prevent sticking, but shake off excess
- If you don’t have a cutter, a clean glass rim can work in a pinch, used the same no-twist way
Mistake 6: Overbaking or baking at the wrong temperature
Biscuits bake quickly. Leaving them in the oven too long or baking at too low a temperature dries them out. The interior moisture evaporates, and the texture turns hard instead of tender.dishwhisperer+1
Fix:
- Preheat your oven fully to 425–450°F (220–230°C) before putting biscuits .
- Set a timer and check at the lower end of the recommended bake time
- Look for light golden tops and a hollow sound when tapped; they don’t need to be deeply browned
Mistake 7: Not enough fat or liquid
Skimping on butter, shortening, or buttermilk in an attempt to “make them healthier” or because of measurement errors can leave biscuits dry and crumbly. Fat contributes tenderness; liquid creates steam and hydrates the flour.
Fix:
- Follow the recipe’s fat and liquid amounts closely, especially on your first try
- If the dough feels very dry and won’t come together, add liquid a tablespoon at a time until it’s just cohesive
- Remember that some stickiness is normal; you can manage it with light flouring rather than drying the dough out
What are the 7 steps in the baking process?
Thinking of biscuit baking as a clear, seven-step process makes it easier to spot where things go wrong and how to correct them. Here’s a practical, biscuit-focused version of the baking process:
Step 1: Prep and measure ingredients
Before you start, gather and measure everything:
- Flour, baking powder, baking soda, salt, sugar (if using)
- Very cold butter, shortening, or lard
- Cold buttermilk or milk
Prepping in advance means you can work quickly once the fat is cut in, which helps keep everything cold.
Step 2: Mix dry ingredients thoroughly
In a large bowl, whisk together:
- Flour
- Leaveners (baking powder and/or baking soda)
- Salt
- Optional sugar
This ensures even distribution of leavening so your biscuits rise uniformly instead of having dense spots.
Step 3: Cut in the cold fat
Add your chilled fat to the dry mix and cut it in using:
- A pastry blender
- Two knives
- Or your fingertips, working quickly
Stop when the mixture resembles coarse crumbs with pea-sized and some larger pieces of fat. Those visible fat pieces are essential for flaky, soft biscuits.
Step 4: Add cold liquid and bring dough together
Make a well in the center and pour in cold buttermilk or milk. Stir gently with a spoon or spatula just until:
- No dry flour remains
- The dough is shaggy and slightly sticky
- You haven’t smoothed it into a uniform ball
This is where many people accidentally overmix. Resist the urge to keep stirring once the dough clumps.
Step 5: Shape with minimal handling
Turn the dough onto a lightly floured surface. With floured hands:
- Gently bring it into a rough rectangle or circle
- Fold it over on itself 3–6 times to build layers
- Pat (don’t roll heavily) to about 1 inch thick
The goal is structure and layers, not a perfectly smooth surface.
Step 6: Cut and arrange for baking
Use a round cutter to press straight down into the dough:
- No twisting, which seals the edges
- Place biscuits close together on a lined baking sheet if you want taller, softer sides, or slightly apart for more crust
- Gather scraps gently, press together once, and cut additional biscuits without overworking.
Step 7: Bake and finish properly
Slide the tray into a fully preheated oven at 425–450°F (220–230°C):
- Bake until tops are light golden and biscuits sound hollow when tapped (usually 12–15 minutes)
- Avoid opening the oven door repeatedly.
- Optionally brush hot biscuits with melted butter right after baking to keep tops softer and add flavor
Let them rest for a few minutes before serving so the interior sets without drying out.
Quick troubleshooting checklist
If your biscuits still come out dry or hard, run through this fast checklist before your next batch:
- Was the butter very cold, almost firm, when cut in?
- Did you stop mixing as soon as the dough clumped together?
- Did you avoid adding extra flour just because the dough felt a bit sticky?
- Did you press the cutter straight down without twisting?
- Was your oven fully preheated to 425–450°F (220–230°C)?
- Did you bake just until golden, not dark brown?
- Are you using all-purpose flour, not bread flour?
Fixing even one or two of these points can completely transform your results.
Final thoughts
Soft, tender biscuits aren’t a matter of luck or secret family recipes; they’re the result of avoiding a few predictable mistakes. Keep your fat cold, handle the dough gently, measure carefully, and bake hot and fast.
Once you master these basics, you’ll find that your biscuits consistently come out light, flaky, and soft on the inside with just enough golden crust on the outside—exactly what great biscuits should be.